Using GUIs and IDEs
Overview
Teaching: 20 min
Exercises: 20 minQuestions
What other ways can I interact with Git other than at the command line?
What tools are available for using Git?
When is it better to use each method of interacting with Git?
Objectives
Use GitKraken to examine your commit history
Add a commit with GitKraken
Use GitKraken to carry out other tasks, such as reverting and pushing to GitHub
Background
As with any aspect of your development environment, the choice of when to use a GUI frontend to Git – if at all – is a matter of personal taste. Like text editors, there are a plethora of options out there and people often have strong opinions about the superiority of one over the other. In short, there’s no single “right” way to do it.
Accordingly, this section, more so than previous ones, is really just an illustration of one way to use Git with one particular GUI program; the hope is that you will gain an understanding of the kinds of tasks that GUIs can make easier, so that you can make your own decision about whether it’s worth the hassle.
There are many GUI interfaces for Git to choose from; the Git website has a decent list. For the purposes of this tutorial though, we will stick to using GitKraken as it is free, cross-platform and has (by our own subjective measure) one of the prettier and more intuitive interfaces. Once you have completed this section, you may want to return to the list of GUIs and see if there are any that better suit your own taste. Another good choice is GitHub Desktop, GitHub’s own attempt at building a GUI: it is polished and well integrated with GitHub. (There’s no Linux client, however.) In addition, many IDEs and editors nowadays (including Visual Studio Code and Sublime Text, etc.) have built-in integration with Git.
Whether you decide to use a GUI or not, however, we suggest it is important that you also understand how to use Git from the command line: firstly, it teaches you about the underlying concepts and, secondly, it is a useful fallback for when your shiny GUI falls over.
Why would I want to use a GUI?
Or: Surely all the cool kids just use Git from the command line?
While programs can convey a lot of information via a simple command-line interface, there are limits to what can be conveyed easily. Notably, in the case of Git, your repository’s history is really a graph (specifically, a directed acyclic graph) and a text interface isn’t a particularly good way of showing a graph.
So far, your recipe repository is fairly simple, but it is worth noting that
repositories can become complex, e.g.:
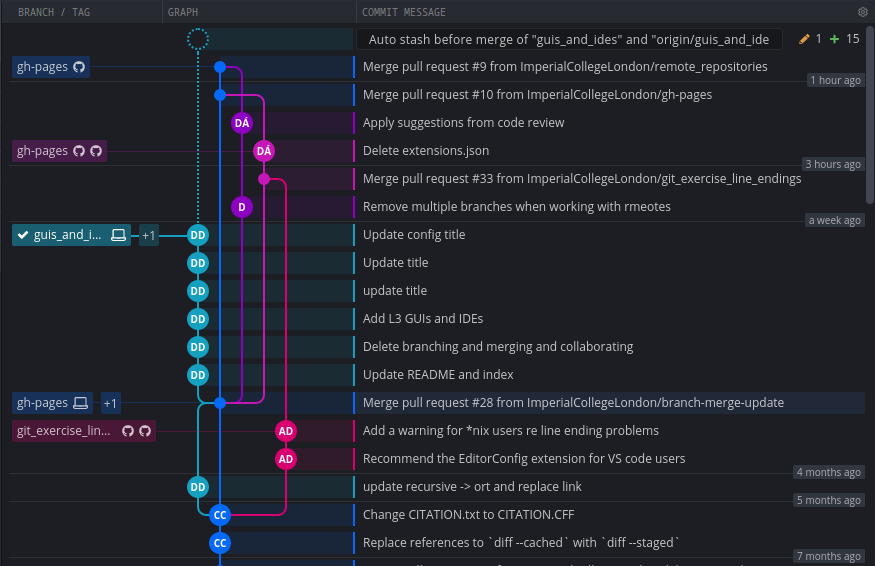
You wouldn’t want to try to visualise this in your terminal, any more than you would a Tube map.
(If you’re wondering how a repository’s history can end up looking so complicated, it’s because of a feature we aren’t covering in this course in detail called branching. For those who are interested, it is covered in the intermediate-level Git course.)
Getting started with GitKraken
Firstly, you will need to download and install GitKraken, which can be obtained here.
Next you need to create a GitKraken account, the main purpose of which is to link the GitKraken app with your GitHub account, so that you can make use of its GitHub integration. While this is technically optional, we strongly recommend it. So, when you start GitKraken, click “Sign up with GitHub”:
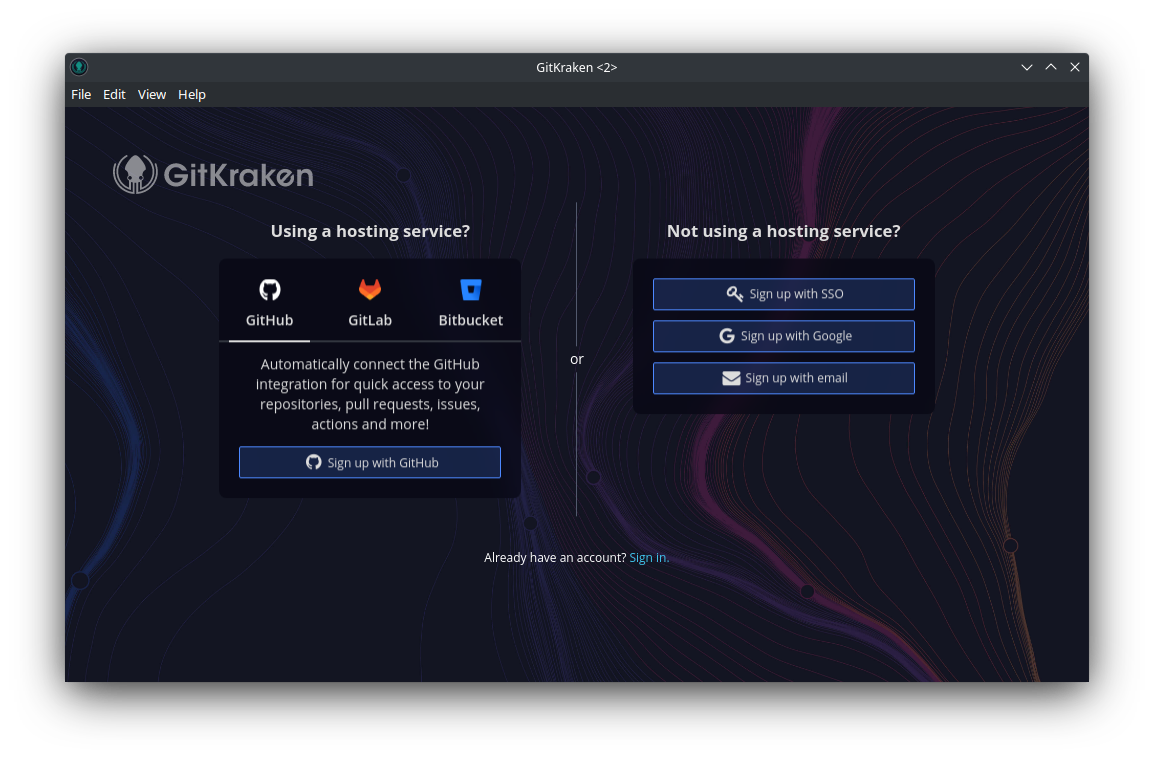
This should open a browser window in which you will have to sign in with GitHub. Once this is complete GitKraken should log in automatically. If not, you may have to copy the OAuth token manually into GitKraken (like I did).
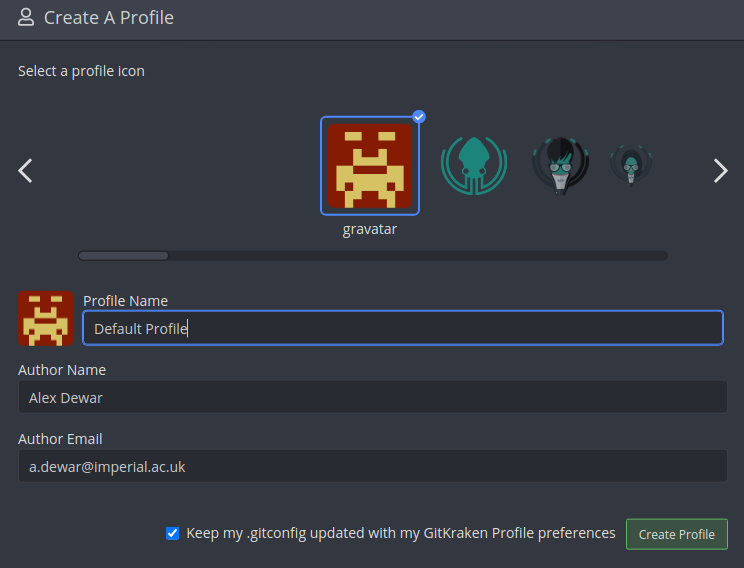
Next, GitKraken will ask you to supply information about who you are, as you did when you first started with Git. Enter your name and email address, then click “Create Profile”. Here’s what it looks like for me:
You’re now ready to roll!
Examining your existing repository
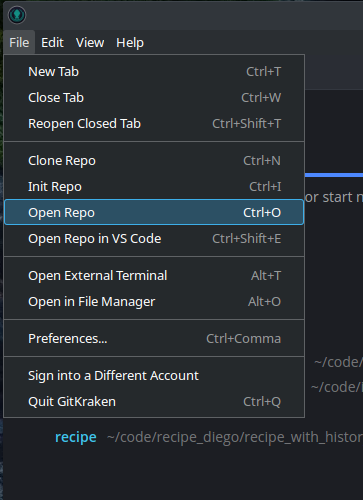
Let’s start by examining the recipe repository you’ve been working on. Open GitKraken
and click “File”, then “Open Repo”.
You should see something like the following:
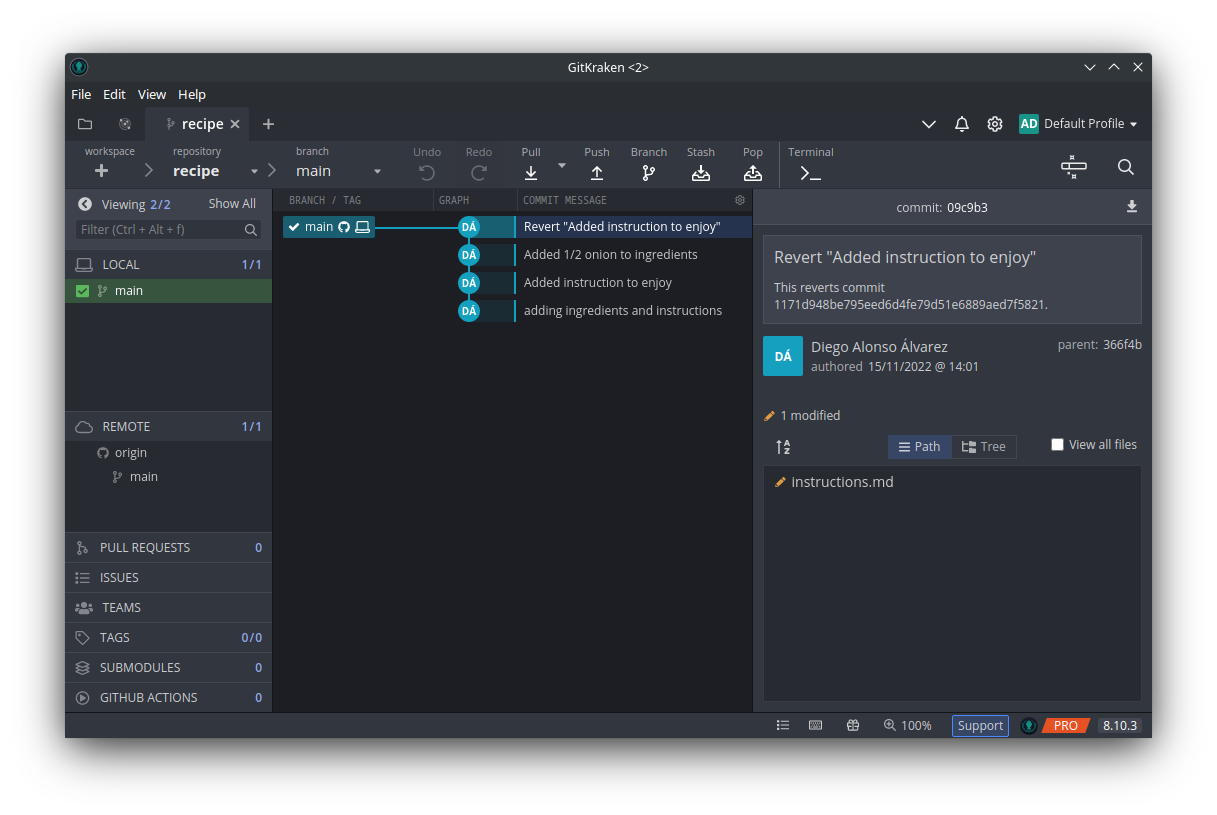
(If your window doesn’t show all of these features, you may need to click on tabs etc. to make them visible.)
For the most part, based on your understanding of Git, you should be able to understand most of the features in this window, namely:
- In the middle of the screen you have your commit history
- On the left-hand side you can see your local
mainbranch and the remote one too (note the GitHub logo to indicate that it’s a remote) - On the left-hand side, you also have a button to display your GitHub issues (I currently don’t have any for this repository)
- On the right-hand side you have details about the current commit (the description, author, which files were changed etc.)
(Don’t worry about the other buttons on the left-hand side for now. They aren’t covered in this course, but are in the intermediate-level Git course.)
Now click on “instructions.md” in GitKraken (under where it says “1 modified”). You should now be able to see what changes were made to the file in the the last commit:
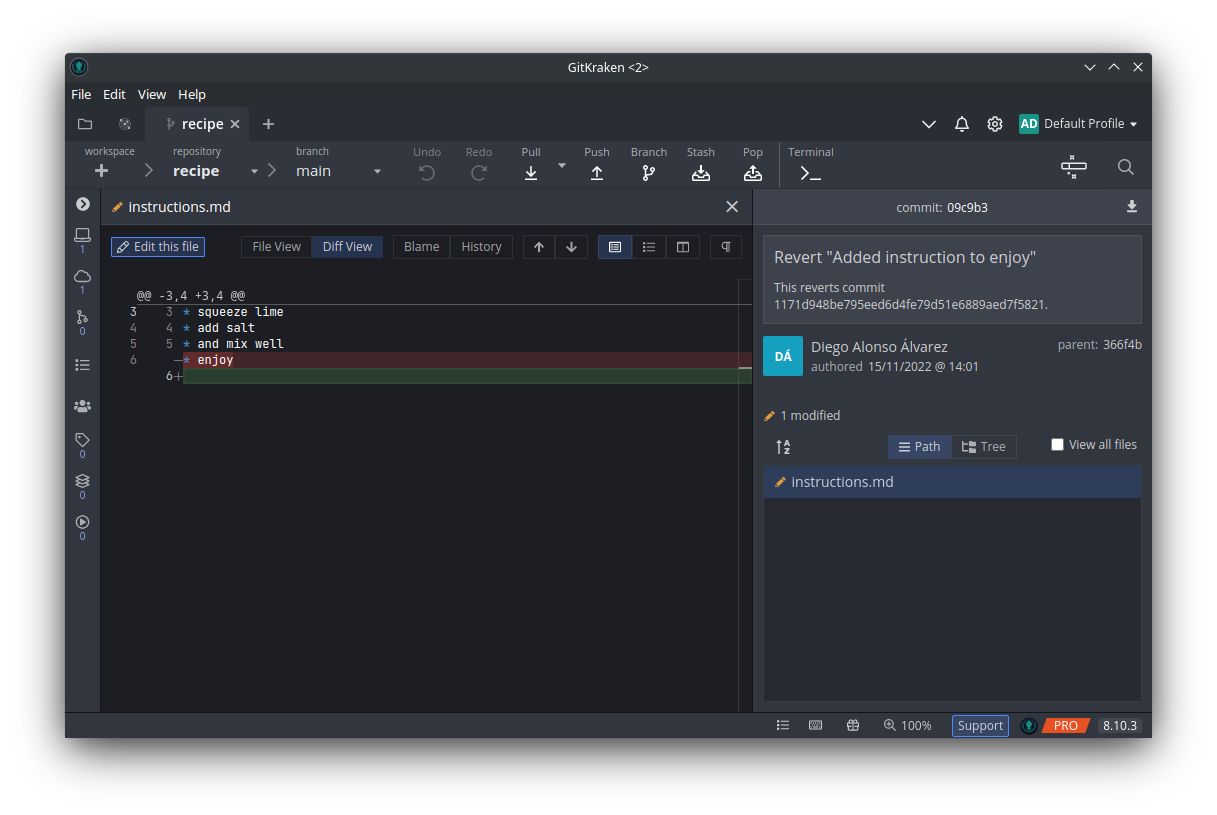
Green lines indicate new text and red ones indicate removed text. In this case, as just the “enjoy” instruction at the end of the file was removed, Git has interpreted this the line being removed and replaced with an empty one.
Click the cross in the central pane to close this view and return to a view of the repository’s history.
Exercise: Examine some more of your repository’s history
Try examining some more of the history to familiarise yourself with the interface. Click on a commit to view details about it. Then click on one of the modified files to remind yourself what changes you made.
Modifying your repository
In this next section, you will make some more changes to your repository.
Return to your text editor/IDE and make the following changes:
ingredients.md: Add “1 clove of garlic, chopped” to the listinstructions.md: Change the instruction “and mix well” to “and mix thoroughly”
Now return to GitKraken and you should see that there is a yellow pencil icon with a “2” next to it:
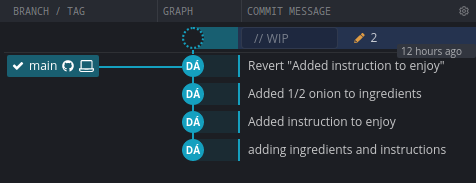
This indicates that two files have been modified since the last commit and that they are not staged.
Click on this line with the yellow pencil and GitKraken will show you which files were changed:
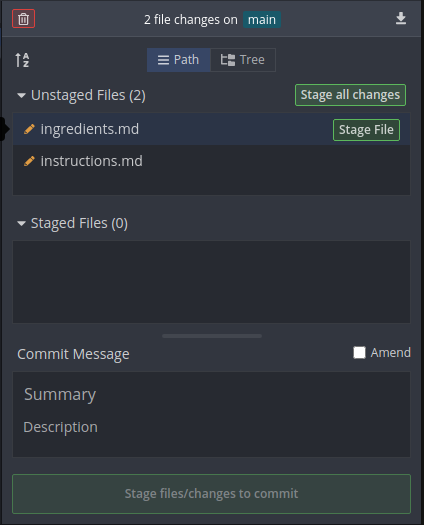
If you click on each of the files you can see how they were changed.
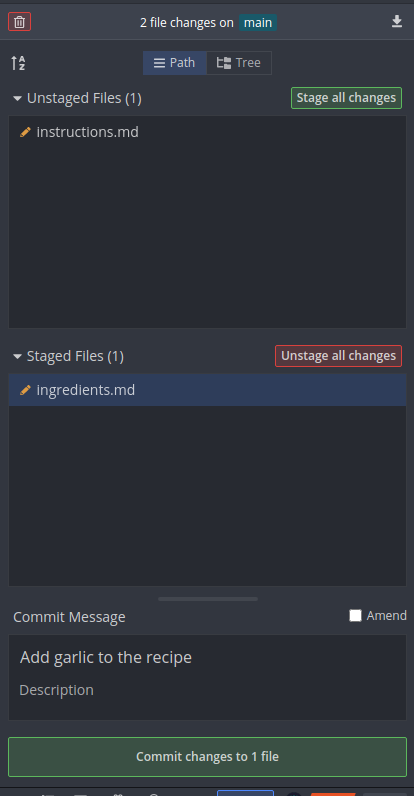
Note that there is a button to stage each file individually and one to stage them both at once. If you accidentally stage a file, there is a corresponding “unstage” button for individual files.
As we have made two changes that are essentially unrelated, let’s make two separate commits. Stage one of the files, add a commit message and click “Commit changes”:
Exercise: Add the other commit by yourself
Stage the file, enter an appropriate message and commit it.
GitKraken allows you to add a one-line summary as well as a longer description, so add one here. How does it appear when you view the commit with
git log?
Now upload your changes to GitHub by pressing the “Push” button.
Going further
Exercise: Explore GitKraken yourself
This final exercise is a change for you to play around and familiarise yourself with the interface. You could try repeating some of the tasks you completed previously using the command line (such as reverting a commit). There is a table below showing how you carry out these operations using GitKraken.
You could also try creating a new repository on GitHub using GitKraken.
There is also a useful series of tutorials in the GitKraken user guide.
| Git command | GitKraken equivalent |
|---|---|
git stage |
Click on pencil icon by changes, then “Stage” or “Stage all changes” |
git commit |
After staging, enter a commit message then click “Commit changes” |
git push |
Click the “Push” button in the toolbar |
git revert |
Right-click on commit and click “Revert commit” |
git init |
Click “File” then “Init Repo” (choose GitHub.com to create remote) |
git status |
Look at the top of the commit list and you can see if there are uncommitted files etc. |
Key Points
Knowing how to use Git from the command-line is useful for understanding concepts and as a fallback
Text editors and IDEs often have built-in Git support
GUIs are particularly useful for viewing the graph-like structure of a repository
It is worth taking time to explore other tools for Git so you can find a workflow that suits you