Importing Data¤
The whole reason for Paricia to exist is to store and facilitate access to hydrology data. Therefore, one of its main components, that depends on everything else, is the data ingestion process.
Submit the data import¤
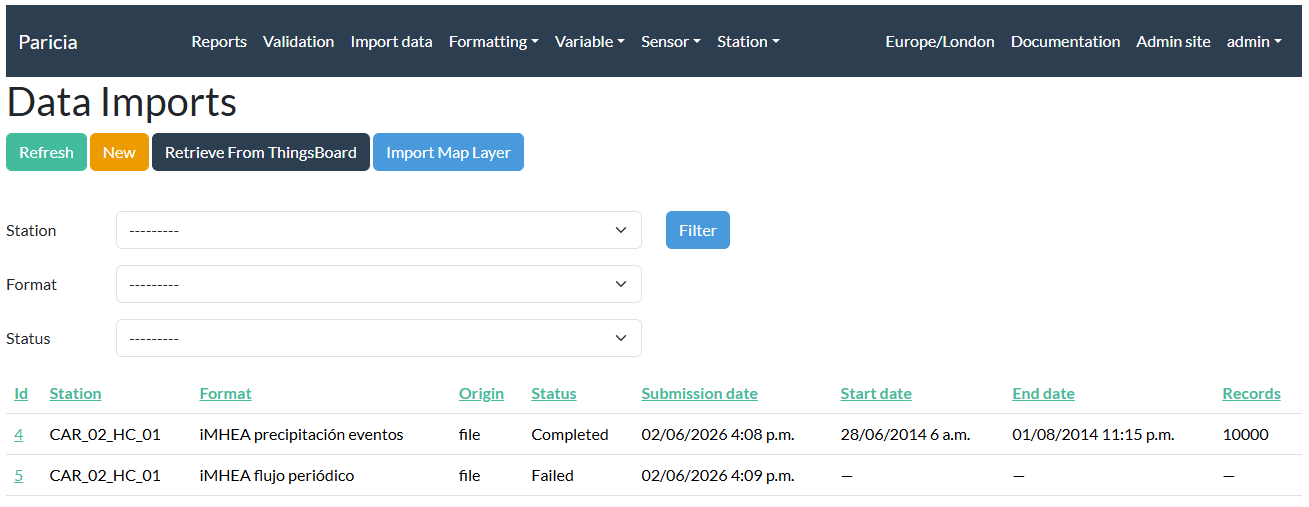
Data import is done via Paricia import listing, clicking in the New button at the top of the page.
A form will open in a new page, containing several fields to be filled by the users.
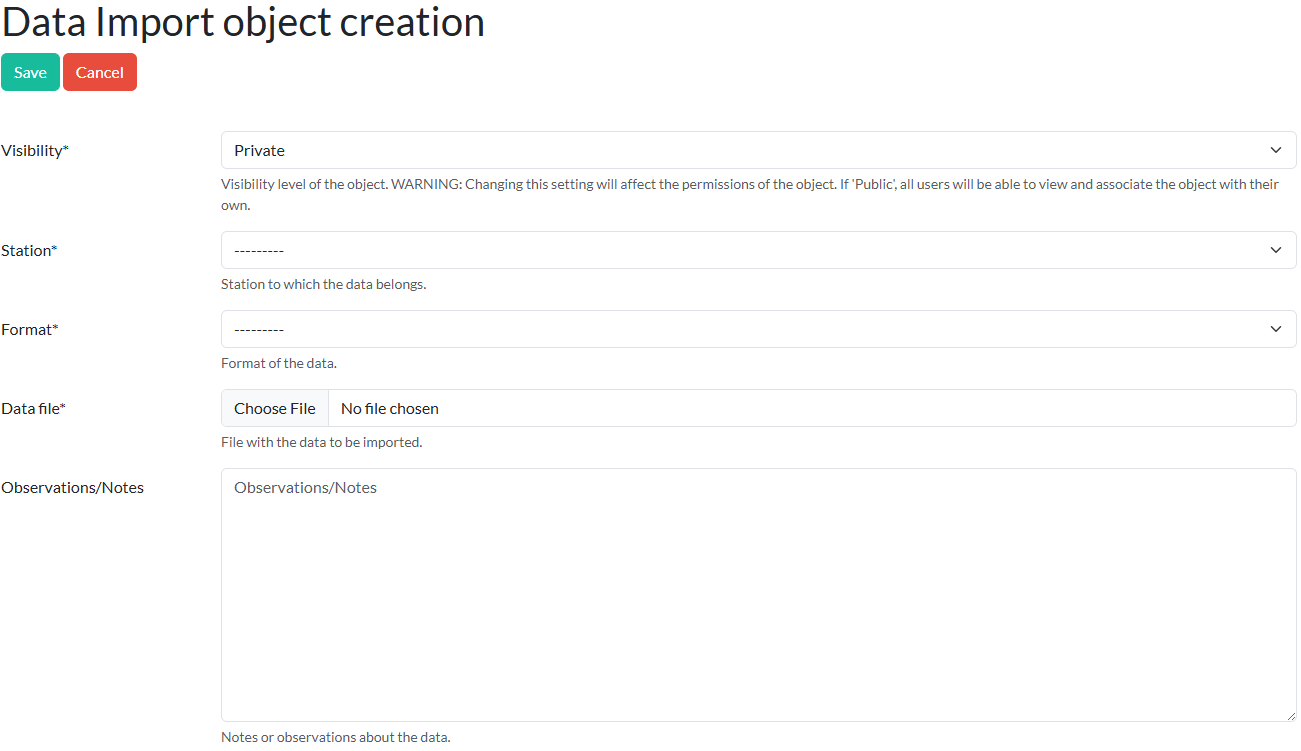
Format¤
The Format is the most important option to choose. If the format is not correct, the import process will fail - hopefully with a meaningful error message indicating what went wrong. If you are unsure about what format to choose, you can explore the options available from the menu Formatting -> Format and opening the formats you want to know more about.
Within the specific format page, among the different settings like the the date and time columns, separator, etc. you will find the Classifications, i.e. the list of variables and the columns they will be imported from if that format is used. Column indexes start in 0, so a variable imported from column number 2, for example, will be imported from the 3rd column of the file. Make sure this list of classifications match the information you want to import from the data file.
The following figure shows the classifications available for a particular format:

Clicking in each classification id will show you more information about that particular classification. Keep in mind you might not have permission to see the details of that classification.
Station¤
For the Station, the user will only be able to choose those for which they have change permission. For the Format, they will be able to choose their own formats and those labelled as public.
The station needs to be complete, i.e. it needs to have all the required fields filled, something that might not be the case if the station was imported into Paricia. A usual field missing is the timezone if that were the case, you will be notified when trying to save the data import. To fix it, just go to the station page - Station -> Station in the top menu - and update the fields that are missing.
Process the data¤
Once the form is complete, click Save at the top of the page and the import process will start. The data is ingested asyncronously, so the user can keep using Paricia. The status of the data import object indicate how the process is going:
- Not Queued: The data ingestion has not started, yet.

- Queued: The data ingestion has started. Data file has been opened and is being processed.

- Completed: The data ingestion has completed successfully. Information on the start and end dates of the data in the local timezone of the user, as well as the number of records, will appear updated

- Failed: The data ingestion failed. Information on what went wrong should appear in the log box at the bottom of the data import detail. Try to fix the issues, based on the feedback provided, by selecting
Edit, then save the form again to update the import. To trigger another data ingestion process, clickReprocessat the top of the page.

Once the data has been ingested successfully, it will be available to validate in the Validation screen and in the Report screen, if the Station it belongs to is labelled as public or internal.
Importing data from Thingsboard¤
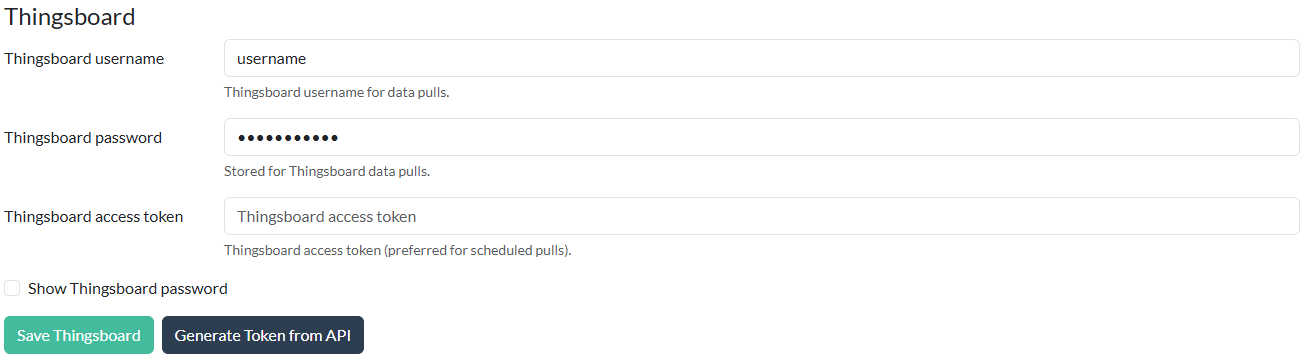
To import data from Thingsboard, you must first enter your Thingsboard credentials in the Account page (this can be found by clicking the dropdown on your username in the top right-hand corner). Following this, generate an access token by selecting Save Thingsboard followed by Generate Token from API.
To retrieve your data, in Import data, select the Retrieve from ThingsBoard button at the top of the page. You will need to create an Import Map, which maps the name of the variable and device in Thingsboard to a Variable element (see Adding elements for more details). Ensure variable and device names match the details in Thingsboard, otherwise your import will fail.
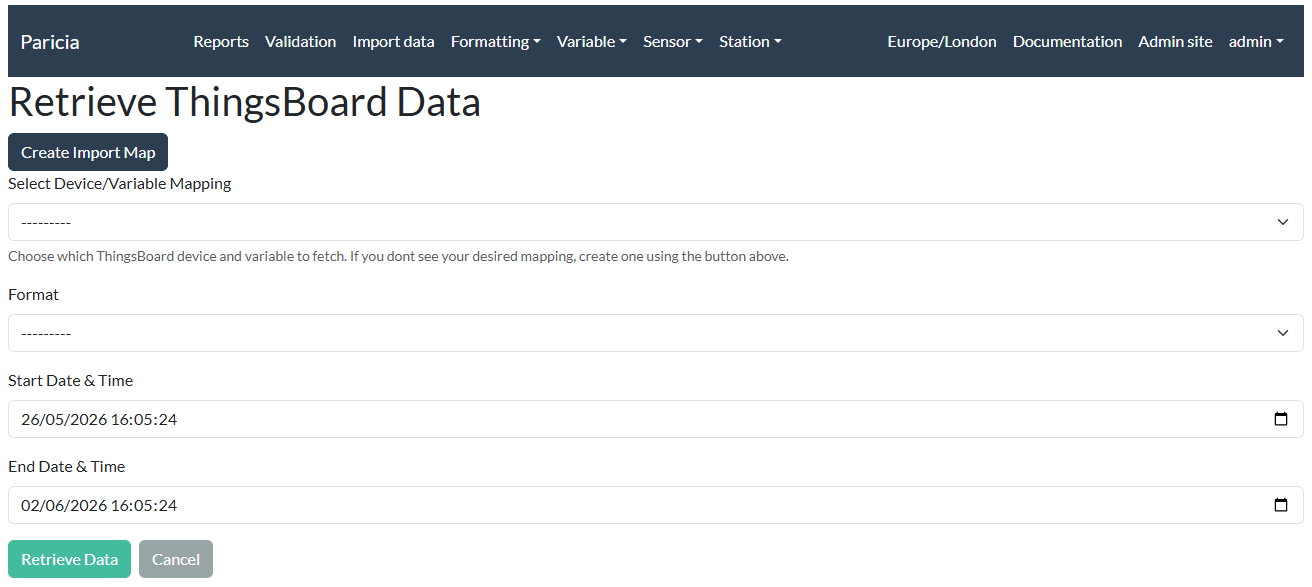
You will also need to create Format and Classification elements for your Thingsboard import, though many of the processiong options relevant to uploading your own data file can be disregarded. For the Format, only Visibility, Format name and the Thingsboard data checkbox need to be specified. For the Classification, only Visibility, Format and Variable need specifying (and optionally if the data is cumulative, incremental or uses a resolution).