Tooling
Estimated read time: 14 minutes
This page explores three core tools that strengthen research software development: uv for dependency and environment management, ruff for automated linting and formatting, and pre-commit hooks for quality gating. Beyond uv, the latter two act as automated safeguards—they catch mistakes before you run your code, saving valuable debugging time.
Overview
uv: A fast, modern Python package manager and environment manager that integrates withpyproject.tomland produces reproducible lock filesruff: A unified linter and formatter that enforces code style and catches common errors automaticallypre-commithooks: Automated checks that run before each git commit, preventing problematic code from entering your repositorytyandpyright: Static type checkers which will be covered in the next tutorial.
Python Environment Management
uv is a Python package manager and environment manager, similar to pip and conda. It offers a few advantages over those tools, namely: substantial performance improvements over conda, automatic Python version installation and management, integration with pyproject.toml, and a universal lock file (uv.lock) for reproducible environments.
What is the pyproject.toml file? And how does it integrate with uv
What is the pyproject.toml file?
pyproject.toml is a configuration file used by packaging tools, as well as other tools such as linters, type checkers, etc.
Instead, it is a general-purpose configuration file for Python projects which can be used beyond packaging for specifying settings for tools or dependencies.
The pyproject.toml file can also specify the entry point for your Python project. This is how users invoke your code from the command line. This project is a command-line tool for running Conway's Game of Life. Once installed into the virtual environment (see getting started), users can invoke it with game-of-life --help. This is configured via the [project.scripts] section:
[project.scripts]
game-of-life = "game_of_life.main:app" # Allows CLI to be launched in venv using `game-of-life` command
The entry point game_of_life.main:app can be broken down as follows:
game_of_lifethe package defined insrc/game_of_life/__init__.py.mainthe module defined insrc/game_of_life/main.py:appthe callable function stored in the variableapp
A common misconception about the pyproject.toml file is that it is not useful unless you're planning to distribute your code by packaging, i.e. bundling it up the code so that others can easily install and use it through PyPI (the python package index). In fact, the pyproject.toml is useful for configuring tools such as uv, providing entry points to your package, and your linter and formatter.
Adding dependencies to pyproject.toml with uv
When using conda, dependencies are usually specified using an environment.yml file. When using pip or uv, the dependencies are specified in the the [dependencies] section of the pyproject.toml. For this project, it has been specified as,
dependencies = [
    "matplotlib",
    "numpy",
    "pydantic",
    "pyyaml",
    "typer",
]
uv integrates with pyproject.toml through the uv add command. This will also automatically update the uv.lock file too. For example, to add matplotlib as a dependency:
$ uv add matplotlib
This would add matplotlib under dependencies.
Optional dependencies and dependency groups
TL;DR
Optional dependencies are published on PyPI while dependency groups are local for development. To install all development dependencies for this project,
$ uv sync --all-extras
Optional dependencies are features that some users may want, but not all require. For example, pydantic offers two optional dependencies: email and timezone. In this project, documentation tools are grouped as an optional docs feature, allowing users who don't need documentation to avoid installing the extra dependencies:
[project.optional-dependencies]

docs = [
    "mkdocs<2",
    "mkdocs-include-markdown-plugin",
    "mkdocs-jupyter",
    "mkdocs-exclude",
    "mkdocs-material",
    "python-markdown-math"
]
Note that in this case, the documentation related dependencies in docs in [optional-dependencies] could also be placed under [dependency-groups] so that it is not installed by default. In fact, this would be ideal set up for this case as it is not strictly necessary for the user and has been organised as such to show the difference between [optional-dependencies] and [dependency-groups].
When working on a coding project there are often dependencies that are useful for development but are not required to use and run the code in the project. For example, pytest is used for running and writing test but isn't required to run the core code of the project. Such dependencies are called development dependencies. These have been specified in the pyproject.toml as follows,
[dependency-groups]

dev = [
    "prek", # Pre-commit: run `prek install` to add to git config
    "pytest",
    "pytest-cov",
    "ruff", # Linter and formatter
    "ty",   # Type checker and language server
]
The specifics on what each of these dependencies are and why they are useful will be covered through the course of this tutorial.
See this page for more information about dependency groups in uv.
Info
The main difference between optional dependencies and dependency groups lies at the packaging level. If you're not planning to distribute your code as a package, the distinction matters less, though it remains good practice to organise them appropriately.
uv's documentation on managing dependencies has more information about the different types of dependencies and how to manage them.
Universal lock file for dependencies
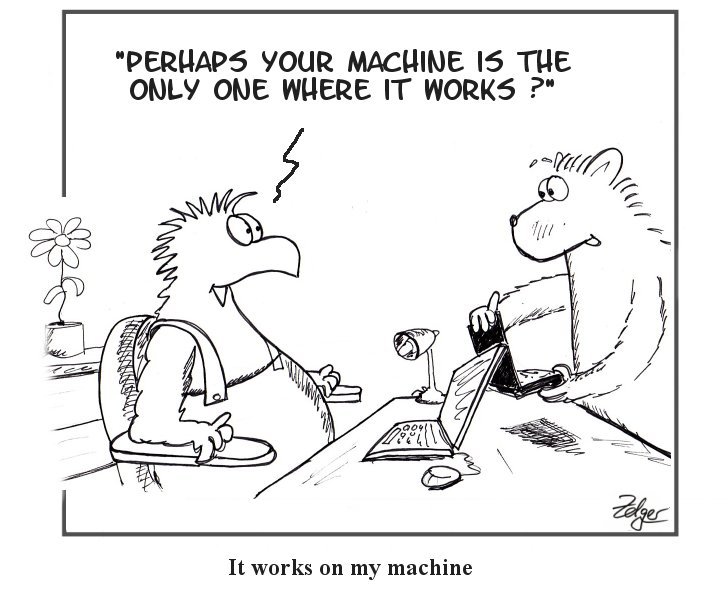
One of the most common frustrations in software development is when code works perfectly on your machine but fails on someone else's. This is often down to differences in the versions of dependencies being used, a problem that gets worse the longer dependencies go without being updated and can quickly spiral into what is known as dependency hell.
Info: Flavours of Dependency Hell
Three ways dependency issues could manifest,
- It won't install. The build fails outright, typically due to a missing or incompatible native dependency.
- It installs but won't run. A missing or incompatible dependency is only discovered at runtime.
- It runs but produces incorrect results. The most insidious failure mode, as it may go unnoticed entirely.
In research software, this is particularly prevalent as keeping dependencies up to date is rarely prioritised. Beyond convenience for users, reproducibility depends on others being able to run the exact code that produced your results. The Turing Way offers excellent guidance on research reproducibility best practices.
Note
One way to keep dependencies up to date is by using dependabot. This checks for updates in your dependencies and submits a pull request when an update is discovered.
uv solves this through the uv.lock file, which records the specific versions of all installed packages. This includes both the direct dependencies (i.e. the ones explicitly mentioned in pyproject.toml) and the transitive ones (i.e. your dependencies' dependencies). Explicitly pinning the transitive dependencies prevents unpinned transitive dependencies from breaking the installation of the direct dependencies, which can be one of the most frustrating aspects of dependency resolution to track down.
For more information, see uv's documentation on locking and syncing for more details.
What does a lock file do?
A lockfile ensures that developers working on the project are using a consistent set of package versions. Additionally, it ensures when deploying the project as an application that the exact set of used package versions is known.
To update all dependencies, use:
$ uv lock --upgrade
Recently, Python introduced the pylock.toml specification which is a tooling independent file "for specifying dependencies to enable reproducible installation in a Python environment". Note: this is not compatible with uv.
Linting and Formatting
Why Linting and Formatting Matter
In research software development, it's easy to focus solely on getting your code to work; making sure your simulation runs and your analysis produces the right output. However, code that only "works" can still be problematic. A linter is a tool that automatically scans your code before you run it to spot issues, such as: unused variables, inconsistent naming conventions, import problems, or code that violates style guidelines. Rather than discovering these issues when tests fail or code is reviewed, a linter catches them immediately while you're working.
A formatter complements a linter by automatically rewriting your code to follow consistent style conventions, such as line length, spacing, and quote style. Together, linters and formatters serve as an automated code reviewer that enforces standards without requiring human effort. In a research context, this is helps to reduces cognitive load (you don't have to think about style), prevents sneaky bugs (unused imports or variables often indicate logic errors), and makes your code more readable to collaborators and your future self.
Tip
Most editors and IDEs can run a linter in the background as you write and highlight problems in the interface in real time. The shorter the feedback loop, the easier the fix. Catching a style or logic issue while you are still in that part of the code beats finding it later in testing or code review.
Linters and formatters are also particularly valuable in collaborative settings,
- A linter enforces project-specific coding style rules in a way that can be automatically checked and, where possible, automatically fixed
- Formatters reduce noise in pull requests and minimize merge conflicts by ensuring consistent formatting across contributors, regardless of individual editor settings
Ruff for Linting and Formatting
This project uses ruff, a fast, all-in-one linter and formatter written in Rust. Ruff combines the functionality of several traditional Python tools (like flake8, isort, black) into a single tool that is substantially faster than running them separately.
Configuration: ruff.toml
Rather than embedding ruff configuration in the pyproject.toml file, this project maintains a separate ruff.toml file. This separation improves readability and makes it easier to reason about linting rules without scrolling through project metadata. However, this configuration could equivalently be placed under a [tool.ruff] section in pyproject.toml. Both are standard and valid approaches.
The configuration starts by specifying the that the format for the project.
Here, the line-length = 120 setting allows lines up to 120 characters. This is more relaxed than the Python default (79 characters) which is very restrictive and not necessary for modern screens and terminals.
# Allow lines to be as long as 120.
line-length = 120
The next section specifies which linting rules to enforce.
By default, ruff only enforces a subset of rules, namely Pyflake (F) and some pycodestyle (E) rules. If you're just starting out with Python, that is a good place to begin without being overwhelmed. If you have some experience with Python, extending the rule set is particularly useful for learning best practices and common pitfalls.
In the ruff.toml file, the [lint] section uses select to explicitly list which rule categories ruff should apply. This is better than extending the default rules because it makes the chosen rules explicit and visible.
[lint]
select = [
    # Follow guidelines to use select instead of extend-select
    # This makes the rule set explicit
    "F",    # PyFlakes
    "A",    # builtins
    "B",    # bug bear - likely bugs and design problems
    "PTH",  # use pathlib instead of os.path
    "NPY",  # NumPy-specific rules
    "N",    # PEP 8 Naming
    "E",    # pycodestyle: error
    "W",    # pycodestyle: warning
    "I",    # isort - checks imports
    "N",    # Follow PEP8 naming
    "ANN",  # Type annotations
    "C4",   # Comprehensions
    "ISC",  # Implicit string concatenation
    "ICN",  # Import conventions
    "LOG",  # Logging
    "G",    # Log format
    "RET",  # Good return practices
    "SIM",  # Simplifications
    "TID",  # Tidy imports
    "TC",   # Type checking
    "PT",   # Pytest style
    "ARG",  # Checks for unused arguments
    "PERF", # Linter for performance anti-patterns
    "PL",   # pylint - static code analyser
    "UP",   # Upgrade old Python syntax
    "D",    # pydocstyle
    #"PD",  # linter for pandas

    "BLE",  # flake8-blind-except
    "COM",  # flake8-commas
    "PIE",  # flake8-pie
    "Q",    # flake8-quotes
    "RSE",  # flake8-raise
    "SLF",  # flake8-self
    "FURB", # refurb
    "RUF",  # Ruff-specific rules
]
ignore = ["ISC001", "COM812", "PLR2004"]
Some of the key categories active in this project are,
F(PyFlakes): Detects undefined names, unused imports, unused variablesE,W(pycodestyle): Enforces PEP 8 style guidelinesI(isort): Ensures imports are sorted and organized consistentlyANN(annotations): Encourages type annotations on function arguments and returnsD(pydocstyle): Checks that docstrings follow the NumPy convention (specified viaconvention = "numpy")NPY,PT,PL: Domain-specific rules for NumPy, pytest, and pylint
The ignore list carves out specific rules that would otherwise conflict or be too strict for this project.
The ruff documentation provides more information on rule selection and details on what each of these rules contain. Note that individual rules that are too strict or not suitable for the project can also be omitted or suppressed through the rule selection.
Tip
Part of gaining mastery in a programming language is learning when some of these rules should be broken.
Running ruff
To check your code with ruff, run:
$ ruff check .
To automatically fix issues that ruff can resolve, use:
$ ruff check . --fix
To format your code consistently, use:
$ ruff format .
Git Commit Hooks
What Are Git Commit Hooks?
Git allows you to automatically run scripts at certain points in the version control workflow, these are called hooks. A pre-commit hook runs automatically just before you commit, giving you an opportunity to check your work and reject the commit if issues are found. Pre-commit hooks are invaluable for maintaining code quality because they prevent bad code from entering your repository in the first place. Rather than discovering problems after commit (during code review or CI/CD), hooks catch them in your local workflow.
Without automation, pre-commit checks require discipline and manual execution. Tools like pre-commit and prek make managing these hooks easy: they read a configuration file, install the hooks into your repository, and run them automatically when you commit.
In this project, both pre-commit and prek can be used to run the hooks. The latter does not need any additional set up as it part of the development dependencies.
Managing Hooks with prek
This project uses the prek to manage git hooks. As it is specified as a development dependency, it will be installed in the Python environment which has been synced using the uv sync --all-extras command. The quick start guide in the documentation contains more information generic set up.
Once prek has been added to your Python environment, invoking prek install in the command line will run the hooks every time you commit.
The configuration is for this project is specified in .pre-commit-config.yaml:
repos:
  - repo: https://github.com/pre-commit/pre-commit-hooks
    rev: v6.0.0
    hooks:
      - id: trailing-whitespace
      - id: end-of-file-fixer
      - id: check-added-large-files
      - id: check-case-conflict
      - id: check-toml
      - id: check-yaml
  - repo: https://github.com/astral-sh/ruff-pre-commit
    # Ruff version.
    rev: v0.15.4
    hooks:
      # Run the linter.
      - id: ruff-check
        args: [ --fix ]
      # Run the formatter.
      - id: ruff-format
  - repo: https://github.com/astral-sh/uv-pre-commit
    # uv version.
    rev: 0.10.7
    hooks:
      - id: uv-lock
  - repo: https://github.com/RobertCraigie/pyright-python
    rev: v1.1.408
    hooks:
      - id: pyright
This file declares which "repositories" (tools) should be run as hooks, along with their versions and which specific hooks to execute from each tool.
Understanding Each Hook Repository
Pre-commit hooks (basic checks): The first repository provides general-purpose checks managed by the pre-commit framework itself:
- trailing-whitespace: Removes trailing whitespace at the end of lines
- end-of-file-fixer: Ensures files end with exactly one newline at the end of the file
- check-added-large-files: Prevents accidentally committing large files
- check-case-conflict: Detects files that differ only in case (problematic on case-insensitive filesystems)
- check-toml: Validates that TOML files (like pyproject.toml) are syntactically correct
- check-yaml: Validates YAML files
Ruff hooks (linting and formatting): The ruff-pre-commit repository runs your configured linting and formatting checks:
- ruff-check --fix: Automatically fixes linting issues that can be auto-corrected
- ruff-format: Formats code to match the configured style
These hooks apply the same rules defined in ruff.toml, ensuring that all code entering the repository meets the project's code quality standards.
UV lock hook: The uv-lock hook ensures that uv.lock is kept in sync with pyproject.toml. When you add or modify dependencies, this hook will update the lockfile automatically.
Type checking (pyright): The pyright hook runs static type analysis to catch type mismatches. Type checking is detailed in a separate tutorial. It's mentioned here only to show how it's integrated into the commit workflow.
Workflow in Practice
Making a commit
When you attempt to commit:
$ git commit -m "feat: Add feature"
Pre-commit automatically runs all configured hooks on the staged files. If any hook fails, your commit is blocked:
ruff check failed
...
# Fix the issues, then:
$ git add .
$ git commit -m "Add feature"  # Try again
Once all hooks pass, the commit succeeds.
Before committing
Before attempting to commit, the hooks can be run using prek -a. The example below shows a case where the formatting of the file had failed. As the issue can be fixed automatically, the hook fixes it.
$ prek -a
trim trailing whitespace.................................................Failed
- hook id: trailing-whitespace
- exit code: 1
- files were modified by this hook

  Fixing docs/1-tooling.md
fix end of files.........................................................Passed
check for added large files..............................................Passed
check for case conflicts.................................................Passed
check toml...............................................................Passed
check yaml...............................................................Passed
ruff check...............................................................Passed
ruff format..............................................................Passed
uv-lock..................................................................Passed
pyright..................................................................Passed
When prek is run again, all the checks pass,
$ prek -a
trim trailing whitespace.................................................Passed
fix end of files.........................................................Passed
check for added large files..............................................Passed
check for case conflicts.................................................Passed
check toml...............................................................Passed
check yaml...............................................................Passed
ruff check...............................................................Passed
ruff format..............................................................Passed
uv-lock..................................................................Passed
pyright..................................................................Passed
Shift Left on Quality
The term "shift left" refers to catching issues as early as possible in development—moving quality checks leftward on the timeline from "after deployment" to "before commit". Pre-commit hooks are a means to achieving it. It helps by catching problems locally, before they ever reach a pull request or shared branch. This makes code review more productive (reviewers focus on logic, not formatting) and keeps the git history clean and consistent.
In research software, where reproducibility depends on having a clear record of what was tested and why, maintaining a clean commit history via pre-commit hooks is particularly valuable.