Branching and merging
Overview
Teaching: 25 min
Exercises: 10 minQuestions
How can I or my team work on multiple features in parallel?
How can changes from parallel tracks of work be combined?
Objectives
Explain what git branches are and when they should be used
Use a branch to develop a new feature
Identify the branches in a project and which branch is currently in use
Explain what merging is
How to incorporate a feature from a branch into your code
Describe a scalable workflow for development with git
Motivation for branches
Differing Goals and Objectives
Developer 1 - “I need a new type of analysis to finish my thesis”
Developer 2 - “My problem is bigger. I need better performance to process all my data”
For simple projects, working with a single branch where you keep adding commits is good
enough. But chances are that you will want to unleash all the power of git at some
point and start using branches.
In a linear history, we have something like:

- Commits are depicted here as little boxes with abbreviated hashes.
- Here the branch
mainpoints to a commit. - “HEAD” is the current position (remember the recording head of tape recorders?).
- When we talk about branches, we often mean all parent commits, not only the commit pointed to.
Now we want to do this
Software development is often not linear:
- We typically need at least one version of the code to “work” (to compile, to give expected results, …).
- At the same time we work on new features – possibly several features concurrently. Often they are unfinished.
- We need to be able to easily separate out work on different features.
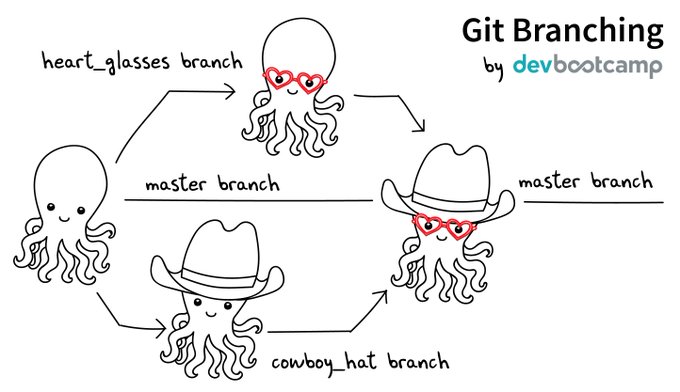
The strength of version control is that it permits the researcher to isolate different tracks of work, which can later be merged to create a composite version that contains all changes:

- We see branching points and merging points.
- Main line development is often called
main. - Other than this convention there is nothing special about
main, it is just a branch. - Commits form a directed acyclic graph (arrows point from parent commits to child commits).
- Commits are relative to the preceding (parent) commit. Whilst
Git can be described as taking “snapshots” of your project this is
slightly misleading. Git actually records the changes made since the last
commit. The difference is subtle but powerful, it makes commands like
git
revert
possible.
A group of commits that create a single narrative are called a branch. There are different branching strategies, but it is useful to think that a branch tells the story of a feature, e.g. “fast sequence extraction” or “Python interface” or “fixing bug in matrix inversion algorithm”.
Starting point
Navigate to your
recipedirectory, containing the guacamole recipe repository.If you then type
git log --oneline, you should see something like:09c9b3b (HEAD -> main, origin/main) Revert "Added instruction to enjoy" 366f4b5 Added 1/2 onion to ingredients 1171d94 Added instruction to enjoy 6ff8aa5 adding ingredients and instructions
Which Branch Are We Using?
To see where we are (where HEAD points to) use git branch:
git branch
* main
- This command shows where we are, it does not create a branch.
- There is only
mainand we are onmain(star represents theHEAD).
In the following we will learn how to create branches, how to switch between them and how to merge changes from different branches.
A useful alias
We will now define an alias in Git, to be able to nicely visualise branch structure in the terminal without having to remember a long Git command (more details about what aliases are can be found here and the full docs on how to set them up in Git are here):
git config --global alias.graph "log --all --graph --decorate --oneline"
Creating and Working with Branches
Firstly let’s take stock of the current state of our repository:
git graph
* ddef60e (HEAD -> main) Revert "Added instruction to enjoy"
* 8bfd0ff Added 1/2 onion to ingredients
* 2bf7ece Added instruction to enjoy
* ae3255a Adding ingredients and instructions
We have four commits and you can see that we are working on the main branch
from HEAD -> main next to the most recent commit. This can be represented
diagrammatically:
Let’s create a branch called experiment where we try out adding some
coriander to ingredients.md.
git branch experiment
git graph
* ddef60e (HEAD -> main, origin/main, experiment) Revert "Added instruction to enjoy"
* 8bfd0ff Added 1/2 onion to ingredients
* 2bf7ece Added instruction to enjoy
* ae3255a Adding ingredients and instructions
Notice that the name of our new branch has appeared next to latest commit. HEAD is still pointing to main however denoting that we have created a new branch but we’re not using it yet. This looks like:

To start using the new branch we need to check it out:
git switch experiment
git graph
* ddef60e (HEAD -> experiment, origin/main, main) Revert "Added instruction to enjoy"
* 8bfd0ff Added 1/2 onion to ingredients
* 2bf7ece Added instruction to enjoy
* ae3255a Adding ingredients and instructions
Now we see HEAD -> experiment next to the top commit indicating that we are
now working with, and any commits we make will be part of the experiment
branch. As shown before which branch is currently checked out can be confirmed
with git branch.

Now when we make new commits they will be part of the experiment branch. To
test this let’s add 1 tbsp coriander to ingredients.md. Stage this and commit
it with the message “try with some coriander”.
git stage ingredients.md
git commit -m "try with some coriander"
git graph
* 96fe069 (HEAD -> experiment) try with some coriander
* ddef60e (origin/main, main) Revert "Added instruction to enjoy"
* 8bfd0ff Added 1/2 onion to ingredients
* 2bf7ece Added instruction to enjoy
* ae3255a Adding ingredients and instructions

Note that the main branch is unchanged whilst a new commit (labelled e1) has
been created as part of the experiment branch.
As mentioned previously, one of the advantages of using branches is working on
different features in parallel. You may have already spotted the typo in
ingredients.md but let’s say that we’ve only just seen it in the midst of
our work on the experiment branch. We could correct the typo with a new commit
in experiment but it doesn’t fit in very well here - if we decide to discard
our experiment then we also lose the correction. Instead it makes much more
sense to create a correcting commit in main. First, switch to the main branch:
git switch main
Then fix the typing mistake in ingredients.md. And finally, commit that change (hint:
‘avo’ look at the first ingredient):
git stage ingredients.md
git commit -m "Corrected typo in ingredients.md"
git graph
* d4ca89f (HEAD -> main) Corrected typo in ingredients.md
| * 96fe069 (experiment) try with some coriander
|/
* ddef60e (origin/main) Revert "Added instruction to enjoy"
* 8bfd0ff Added 1/2 onion to ingredients
* 2bf7ece Added instruction to enjoy
* ae3255a Adding ingredients and instructions

Summary
Let us pause for a moment and summarise what we have just learned:
git branch               # see where we are
git branch <name>        # create branch <name>
git switch <name>        # switch to branch <name>
Since the following command combo is so frequent:
git branch <name>        # create branch <name>
git switch <name>        # switch to branch <name>
There is a shortcut for it:
git switch -c <name> # create branch <name> and switch to it
Merging
Now that we have our two separate tracks of work they need to be combined back
together. We should already have the main branch checked out (double check
with git branch). The below command can then be used to perform the merge.
git merge --no-edit experiment
Merge made by the 'ort' strategy.
 ingredients.md | 1 +
 1 file changed, 1 insertion(+)
now use:
git graph
*   40070a5 (HEAD -> main) Merge branch 'experiment'
|\
| * 96fe069 (experiment) try with some coriander
* | d4ca89f Corrected typo in ingredients.md
|/
* ddef60e (origin/main) Revert "Added instruction to enjoy"
* 8bfd0ff Added 1/2 onion to ingredients
* 2bf7ece Added instruction to enjoy
* ae3255a Adding ingredients and instructions

Merging creates a new commit in whichever branch is being merged into that contains the combined changes from both branches. The commit has been highlighted in a separate colour above but it is the same as every commit we’ve seen so far except that it has two parent commits. Git is pretty clever at combining the changes automatically, combining the two edits made to the same file for instance. Note that the experiment branch is still present in the repository.
Now you try
As the experiment branch is still present there is no reason further commits can’t be added to it. Create a new commit in the
experimentbranch adjusting the amount of coriander in the recipe. Then mergeexperimentintomain. You should end up with a repository history matching:Solution
git switch experiment
# make changes to ingredients.md
git stage ingredients.md
git commit -m "Reduced the amount of coriander"
git switch main
git merge --no-edit experiment
git graph
* 567307e (HEAD -> main) Merge branch 'experiment' |\ | * 9a4b298 (experiment) Reduced the amount of coriander * | 40070a5 Merge branch 'experiment' |\ \ | |/ | * 96fe069 try with some coriander * | d4ca89f Corrected typo in ingredients.md |/ * ddef60e (origin/main) Revert "Added instruction to enjoy" * 8bfd0ff Added 1/2 onion to ingredients * 2bf7ece Added instruction to enjoy * ae3255a Adding ingredients and instructions

Summary
Let us pause for a moment and recapitulate what we have just learned:
git merge <name> # merge branch <name> (to current branch)
Typical workflow
These commands can be used in a typical workflow that looks like the below:
$ git switch -c new-feature  # create branch, switch to it
$ git commit                 # work, work, work, ...
                             # test
                             # feature is ready
$ git switch main            # switch to main
$ git merge new-feature      # merge work to main
$ git branch -d new-feature  # remove branch
Key Points
Git allows non-linear commit histories called branches
A branch can be thought of as a label that applies to a set of commits
Branches can and should be used to carry out development of new features
Branches in a project can be listed with
git branchand created withgit branch branch_nameThe
HEADrefers to the current position of the project in its commit historyThe current branch can be changed using
git switch branch_nameOnce a branch is complete the changes made can be integrated into the project using
git merge branch_nameMerging creates a new commit in the target branch incorporating all of the changes made in a branch