Extensions - Sensing and evaluating in real time
Python GUI programming Day 5
From previous study you have learned how to display and control display of data containing multiple channels from a file. In this session, you will learn how to display sent from a serial port. This is useful when you want to display data from a sensor and evaluate the data in real time.
Python_GUI_day5_simple.py is a simple example to show serial port transmission.
Python_GUI_day5_display.py is an example to display data from serial port.
Python_GUI_day5_exercise.py is the answer to exercise.
Basic knowledge about serial port
Serial communication has been a fundamental method for data exchange between computers and various peripheral devices for decades. One of the most common interfaces for serial communication is the serial port. The serial port, also known as a COM port or RS-232 port, provides a standard communication interface that allows data to be transmitted and received one bit at a time.
Serial ports were first introduced in the 1960s as a means to connect devices like modems, printers, and early computer systems. They gained popularity due to their simplicity and versatility, and even with the emergence of faster and more advanced interfaces, serial ports have continued to be widely used in many industries.
Serial port communication in Python
In Python, serial communication is handled by the pySerial module. The pySerial module is a useful tool that enables you to easily communicate in serial. It is a pure Python module that works with Python 2.x, Python 3.x, and PyPy. The module named “serial” automatically selects the appropriate backend. PySerial offers a higher level interface than the native serial module and is easier to use for beginners.
Before you start
- install pySerial package
You need to install the pySerial package. You can install it using conda:
conda install pyserial
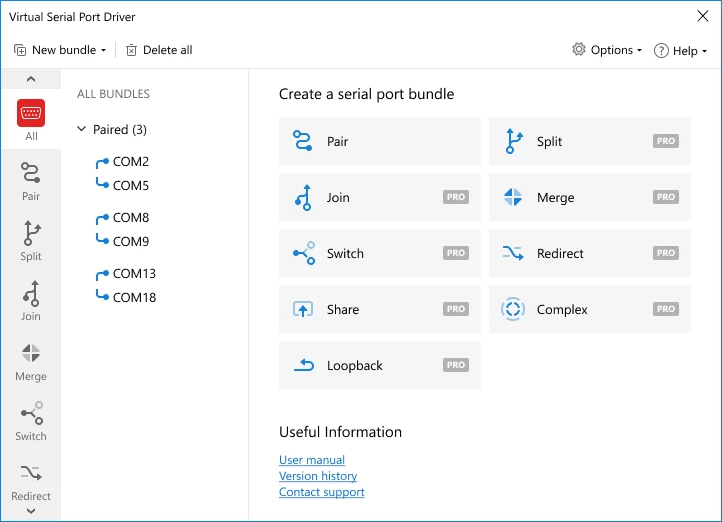
For the purpose of demonstrator, you can use a virtual serial port emulator so that you don't need a physical serial port transmission link. You can download it from this website. After you install the software, you can create a virtual serial port pair. The virtual serial port pair will be used to simulate the communication between two devices. You can use the virtual serial port pair, for example, COM1 and COM2, to send data from one port and receive the data from the other port. This is a paid software. You can use the trial version for 14 days. A detailed instruction to create virtual serial port pair can be found here.
Interface for the virtual serial port emulator:
If you are using virtual serial port emulator, you need another software called serial port monitor to simulate the peripheral device. Serial port monitor can be used to send and receive data from the virtual serial port. You can download it from here.
If you are using a real peripheral device, you need to connect the device to your computer. You can use a USB to serial adapter to connect the device to your computer. You can find the driver for the USB to serial adapter on the manufacturer’s website. After install the driver, you can communicate with the device through serial port.
Steps to communicate between two serial ports
- Create a serial port pair using the virtual serial port emulator. Assume a pair of serial ports called COM1 and COM2 is created. COM1 is the port used to send data and COM2 is the port used to receive data.
- Open the serial port COM1 using pySerial. You can use the following code to open the serial port COM1:
import serial
ser = serial.Serial('COM1')
ser.write(b'Hello World')
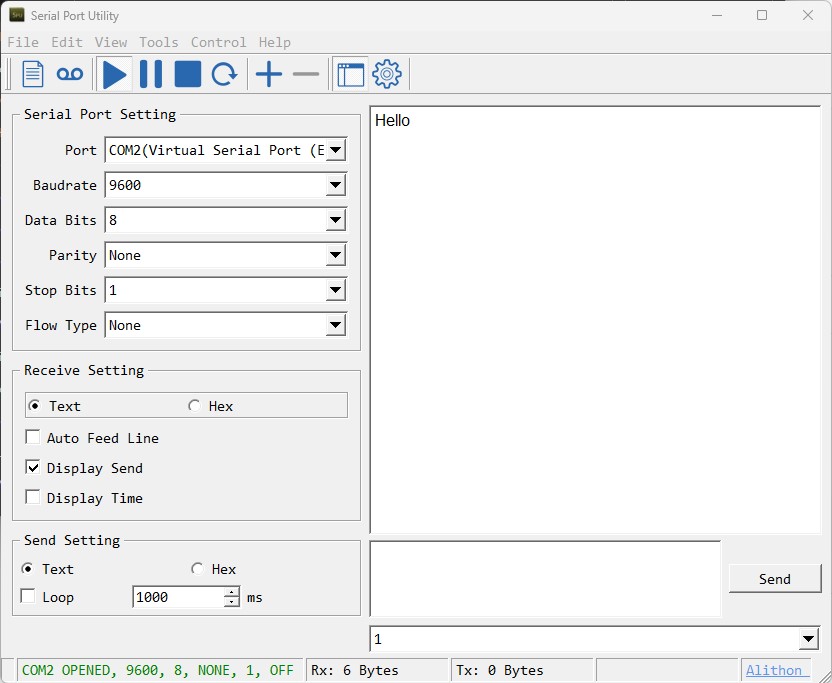
The full codes for this part can be found in Python_GUI_day5_simple.py
Display data from serial port on GUI
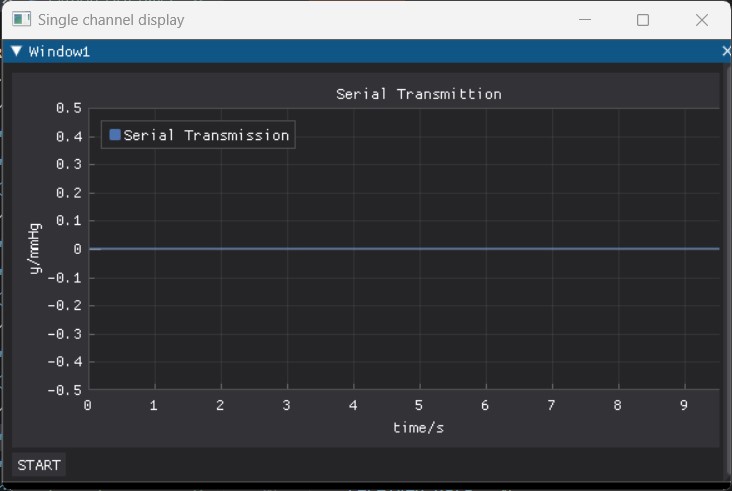
In this tutorial, we will use a single channel display widget to display data received from serial port and one button to start and stop the display. The data is sent through COM2 from the serial port monitor and received by COM1. The data is then displayed on the GUI. We will use the single channel display from day2 and add a START/STOP button to the GUI.
- Create a new project and add a single channel display widget and a button to the GUI. The GUI should look like this:
- Create a serial port object and open the serial port COM1. You can use the following code to create a serial port object and open the serial port COM1:
import serial
ser = serial.Serial('COM1')
def read_serial():
    global ser
    data = ser.readline()
    return data
The full codes for this tutorial can be found in Python_GUI_day5_display.py
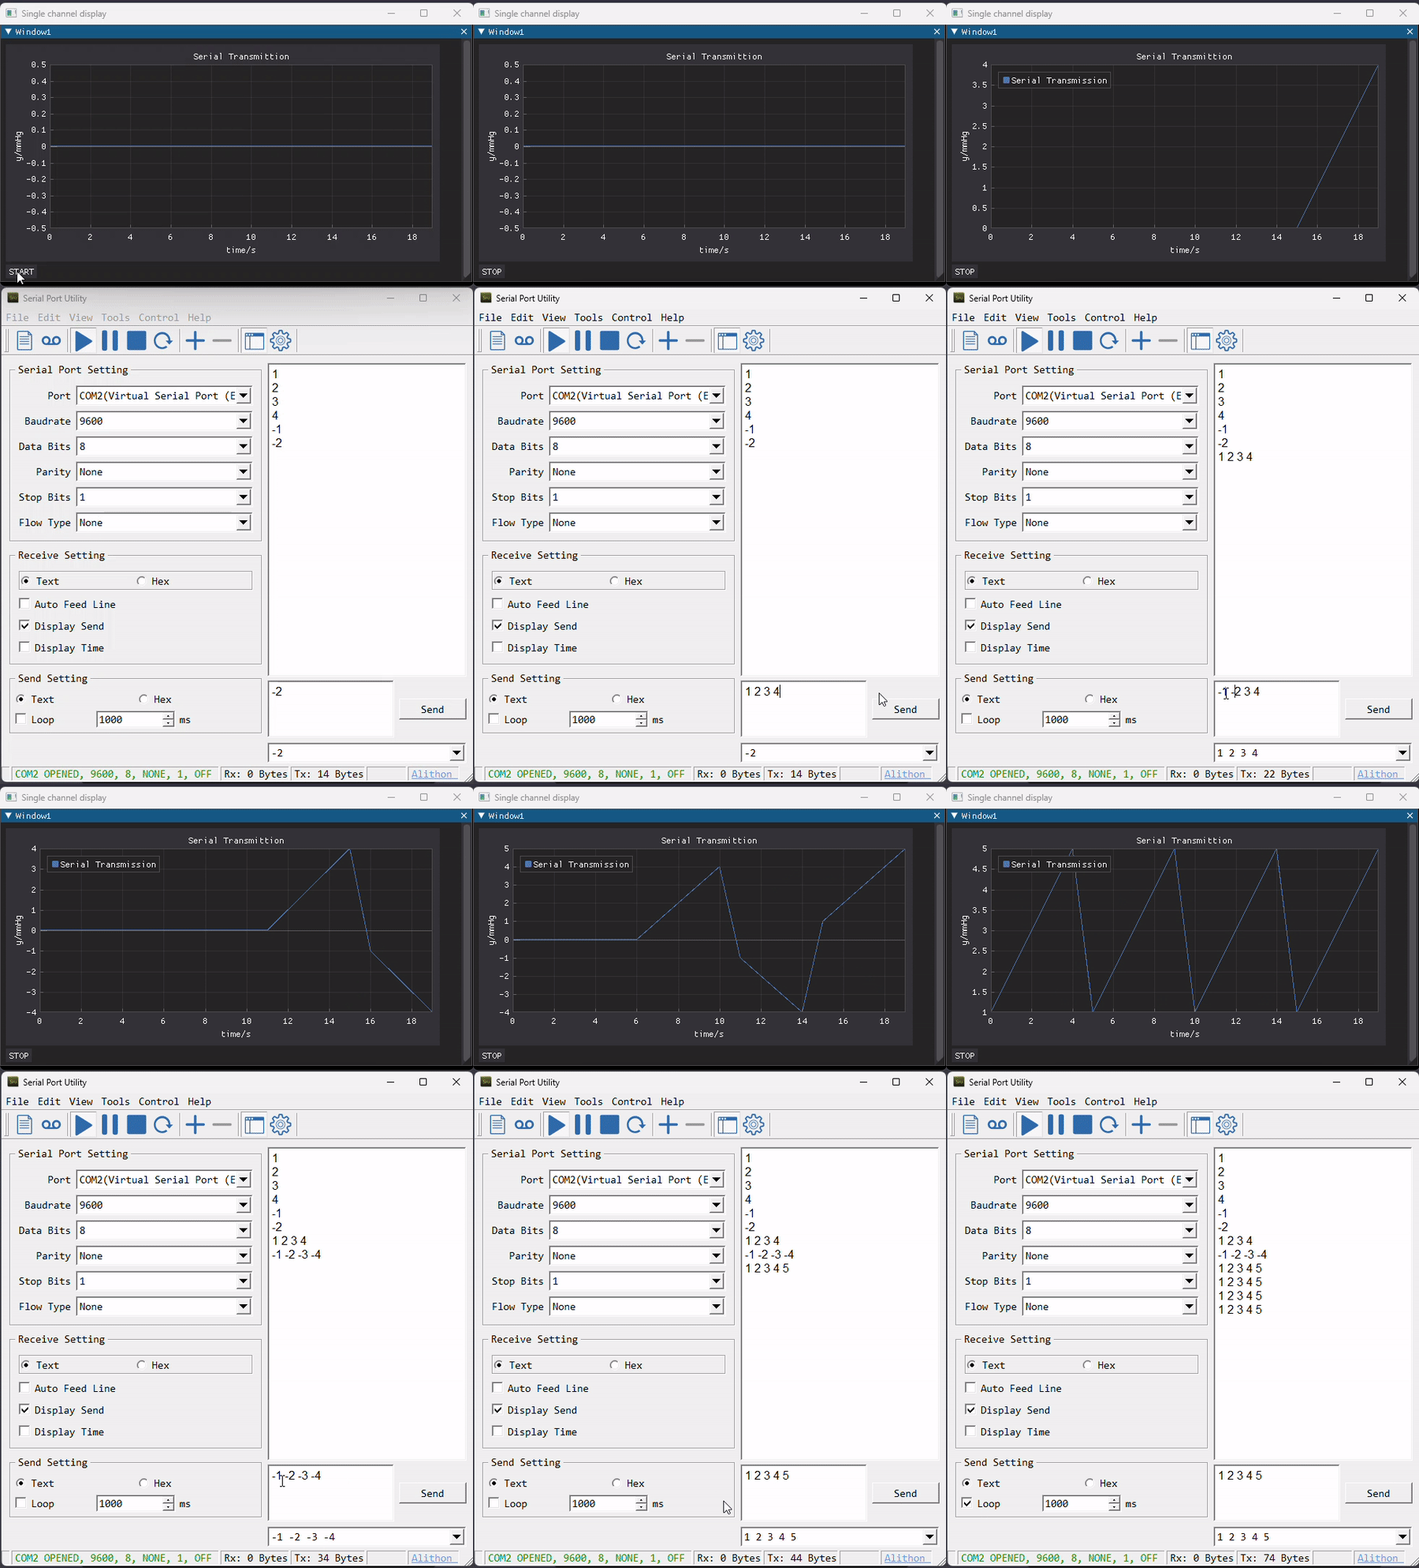
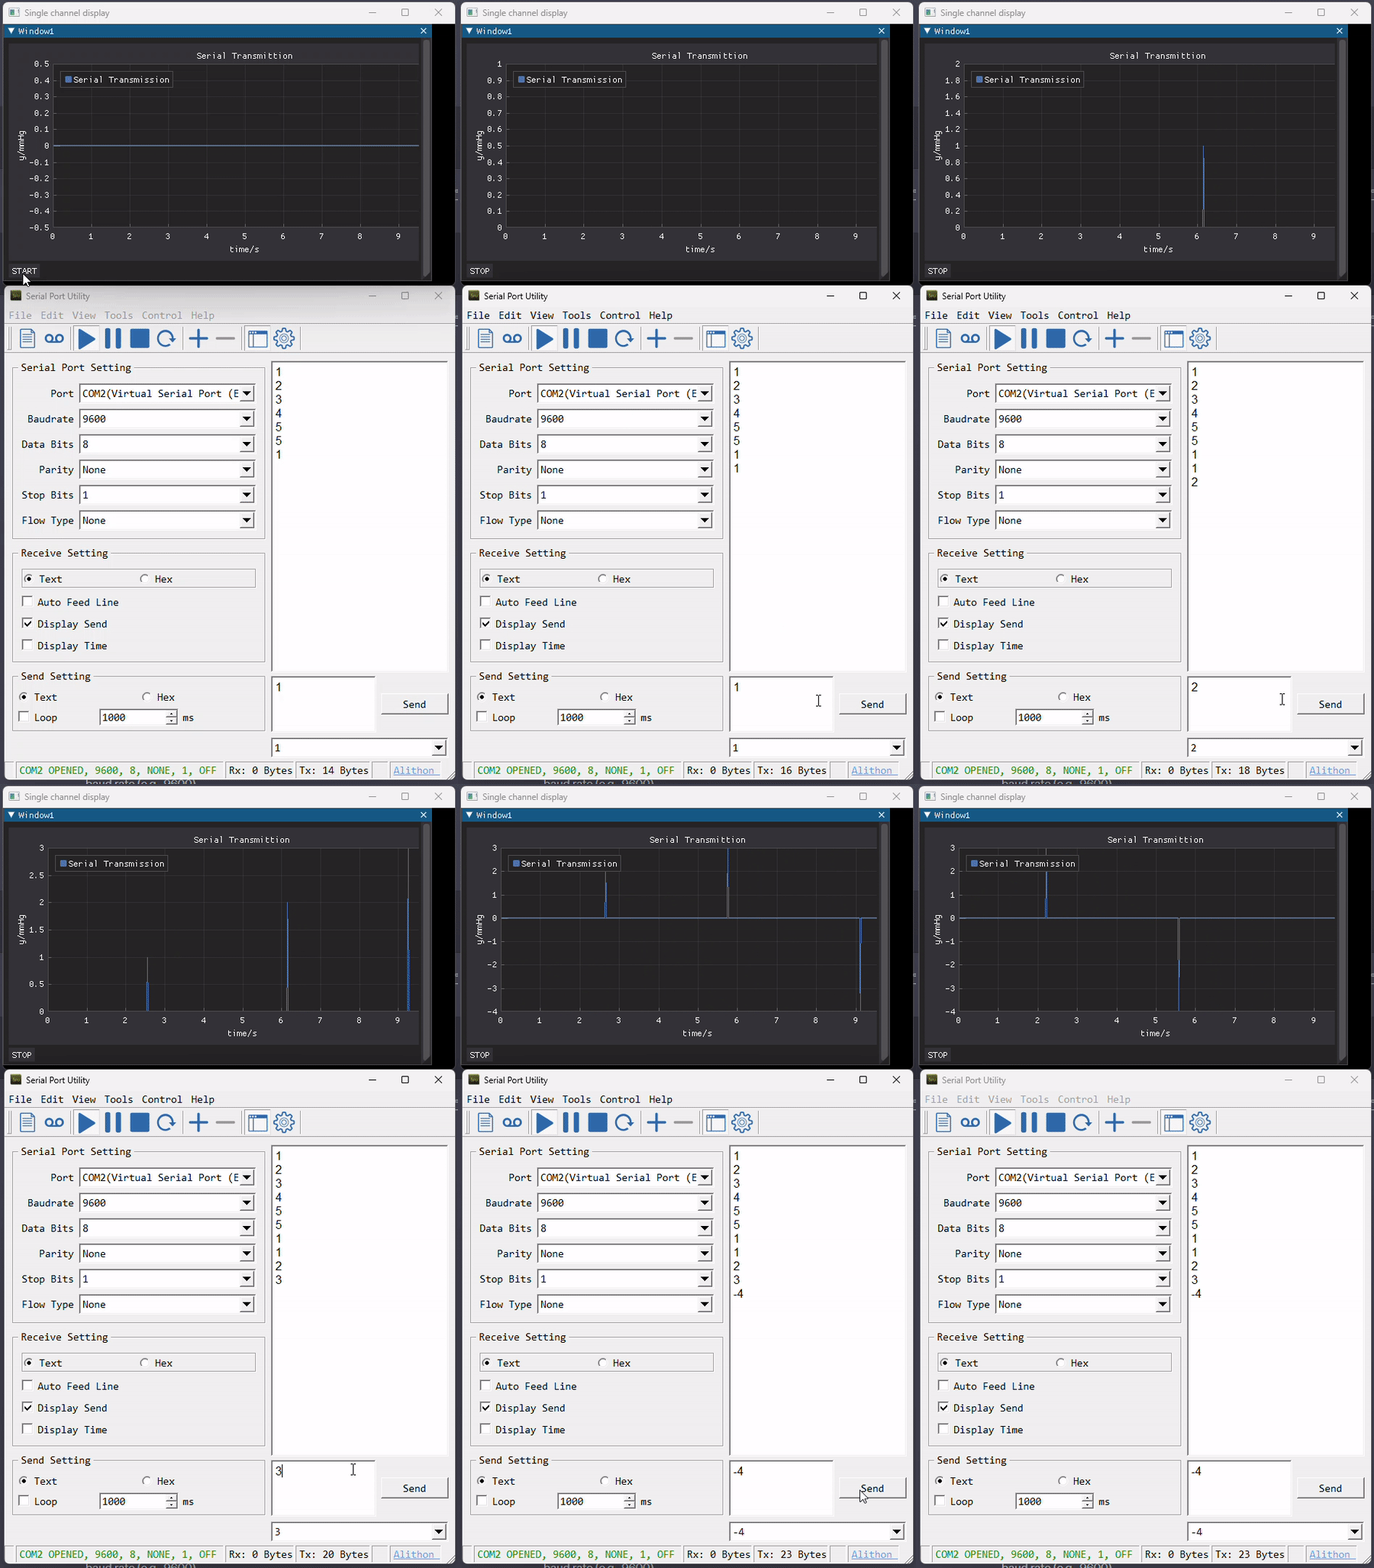
An example has been shown below. When the START button is clicked, 1, 2, 3, 4, 5 are sent to the serial port COM1. The data are then displayed on the GUI.
Hints
- In serial communication, the baud rate determines the speed of serial transmisstion. You should make sure the baud rate of the serial port is the same as the baud rate of the device you are communicating with. In the tutorial, the baud rate is set to 9600 at both sides.
- All the data sent from the device are stored in a buffer. If the device starts transmission before the program starts to receive data, those data will be stored in the buffer. When you start to receive data, you will receive all the data in the buffer first. Just in case, you can clear the buffer before you start to receive data. You can use the following code to clear the buffer:
ser.reset_input_buffer()
append method to read all the frames. One frame contains all the data you type in the transmitting box before you click send. A detailed introduction to frames in serial port transmittion can be found here.
- The serial port object has a property called
in_waiting. This property returns the number of bytes in the receive buffer. You can use this property to check if there is any data in the buffer.
if ser.in_waiting > 0:
    data = ser.readline()
is_open. This property returns True if the serial port is open. You can use this property to check if the serial port is open. You can use the following code to close the serial port if the serial port is open:
if ser.is_open:
    ser.close()
close(). This method closes the serial port. You can use this method to close the serial port. You can use the following code to close the serial port:
ser.close()
ser.open() to open the serial port in a similar way.
- The serial port object has a method called
readline(). This method reads a line from the serial port. You can use this method to read a line from the serial port. You can use the following code to read a line from the serial port:
data = ser.readline()
write(). This method writes data to the serial port. You can use this method to write data to the serial port. You can use the following code to write data to the serial port:
ser.write(b'Hello World')
Exercise
The most important part of real time data display is to keep the display speed the same as the data acquisition speed. If the display speed is slower than the data acquisition speed, you will lose some data points. If the display speed is faster than the data acquisition speed, you will see the same data points multiple times. In this exercise, you will learn how to keep the display speed the same as the data acquisition speed.
The display speed in Python_GUI_day5_display.py is much faster than the data acquisition speed (which is manually controlled). Therefore, you see discrete data points other than continuous data. You can force the display speed to be the same as the data acquisition speed by only updating the display when new data is available. The solutions to this exercise can be found in Python_GUI_day5_exercise.py.
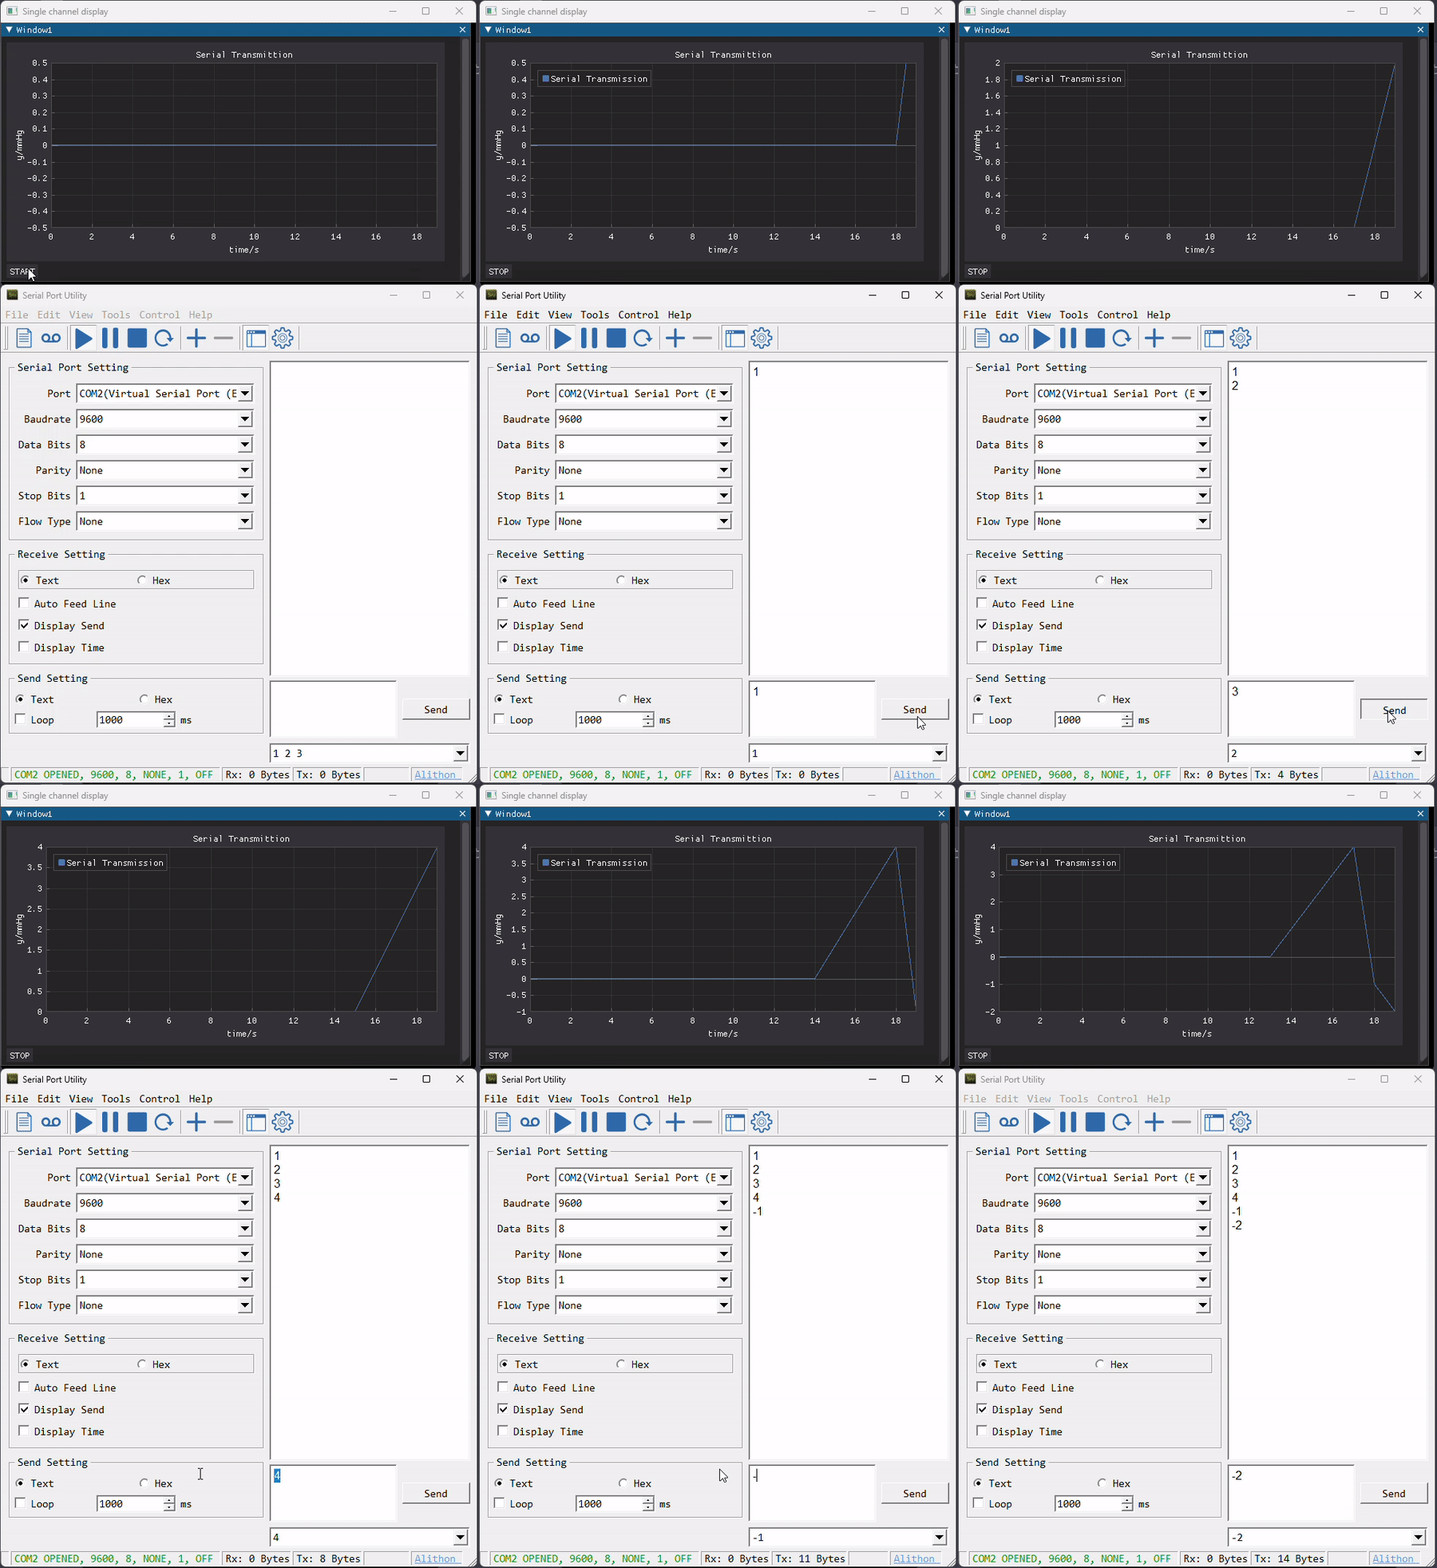
At this time, the display is updated only when a new data point is sent from the serial port. I also provide the supports for sending multiple data points at the same time seperated by a space. You can tick the Loop checkbox to simulate continuous data acquisition.
