Installation#
To install PyProBE you must be running Python 3.11 or later. It is recommended to use a virtual environment to install PyProBE, for example venv or conda.
If you are completely new to Python
Recommended software
The easiest way to get started with data processing in Python is to use Anaconda for package management and Visual Studio Code for code editing. You will need Git installed to clone the repository. If you are new to Git version control, the GitHub Desktop is a good place to start.
In order to follow the installation instructions below, on Windows you can work in Anaconda Prompt. On Mac or Linux you can use Terminal directly.
Using PyProBE after installation
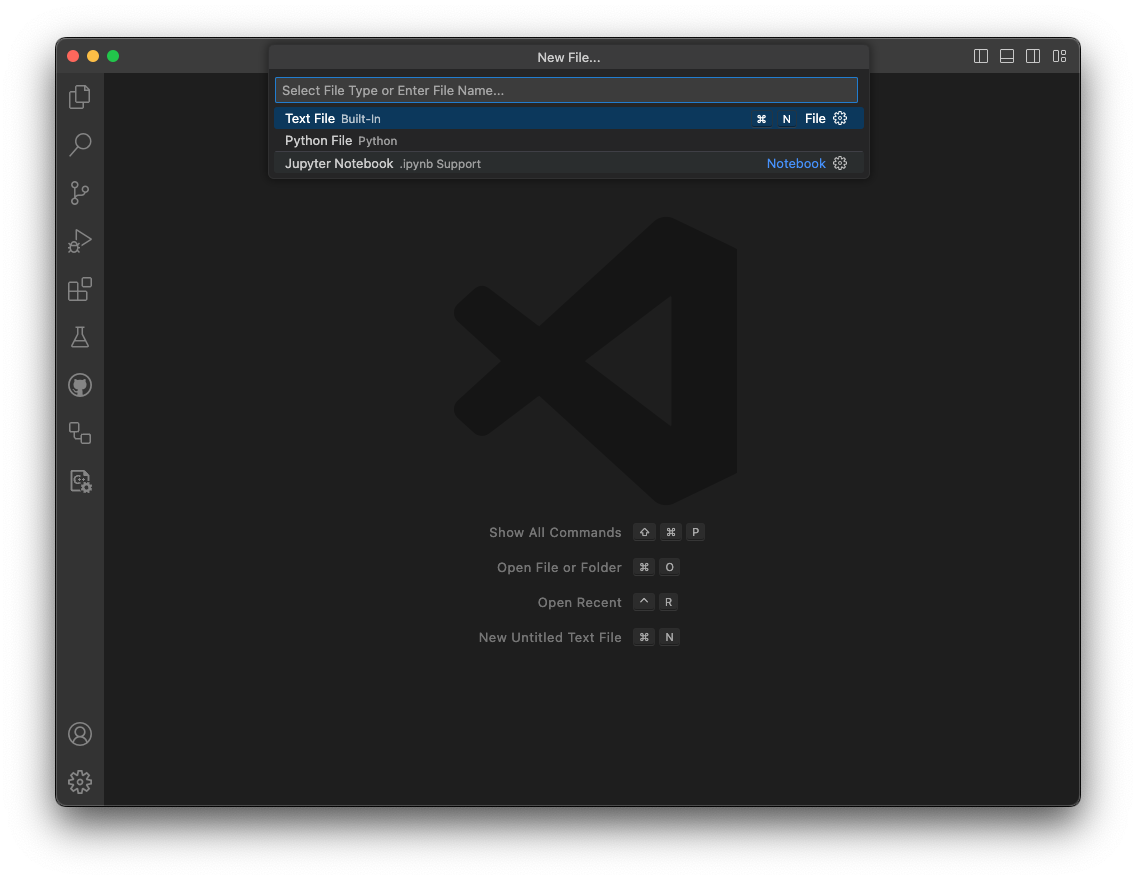
Jupyter Notebooks are a popular format for Python data processing. VSCode has support for writing and running these, which you can open from the dropdown menu:

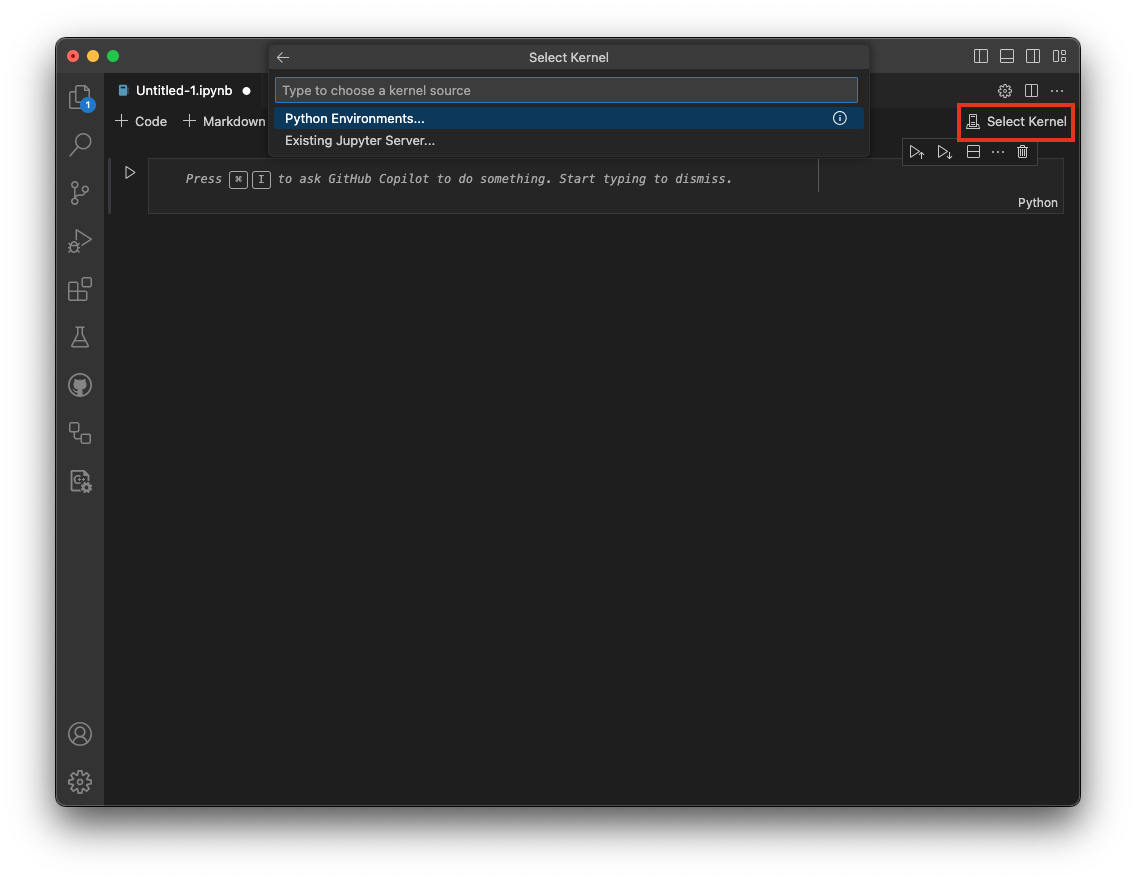
You should then select the Anaconda environment that you will create from the list of available Python environments:

The steps to install PyProBE are as follows:
Create and activate a virtual environment.
In your working directory:
python -m venv venv
source .venv/bin/activate
In any directory:
conda create -n pyprobe python=3.12
conda activate pyprobe
Install PyProBE with pip:
pip install PyProBE-Data
Optional dependencies can be added to the installation as follows:
pip install 'PyProBE-Data[hvplot]'
If a method uses an optional dependency, it will be detailed in the api documentation. If these methods are run without their dependencies installed, they will return an error.
You can create a new python script or jupyter notebook to process your data. You can import PyProBE into your script as follows:
import pyprobe
Before being able to launch the dashboard you will need to initialise streamlit. Do this by running the streamlit Hello app from your command line:
streamlit hello